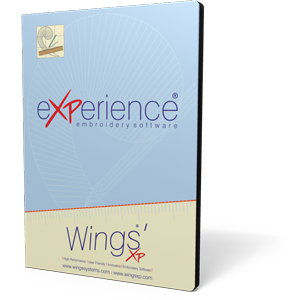
The complete professional embroidery package
In our eXPerience 6 software, we did our best to create an easy to use and fast software which will help you create your embroidery designs with the best possible quality. eXPerience 6 is the complete professional embroidery package with the best embroidery quality in the market.
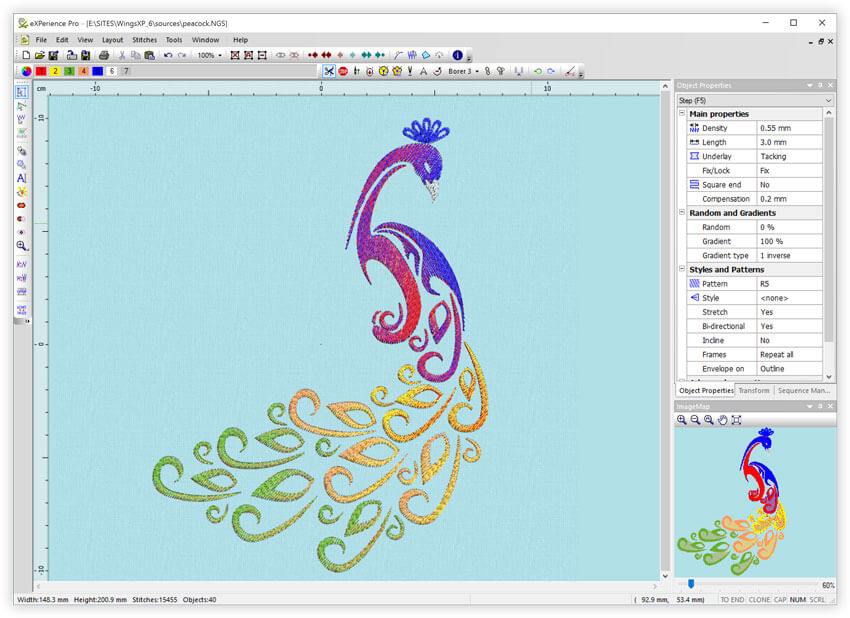
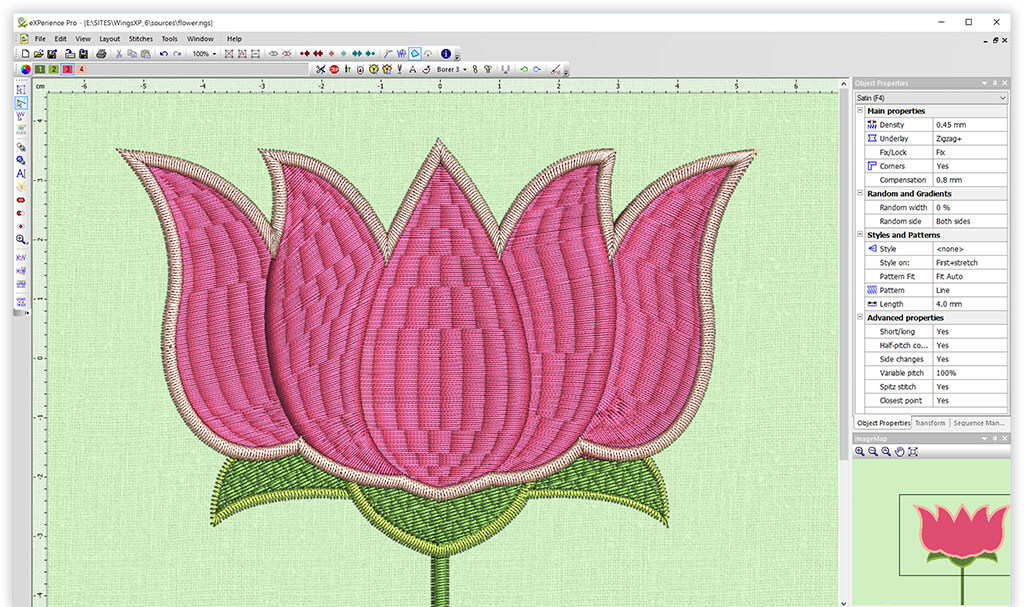
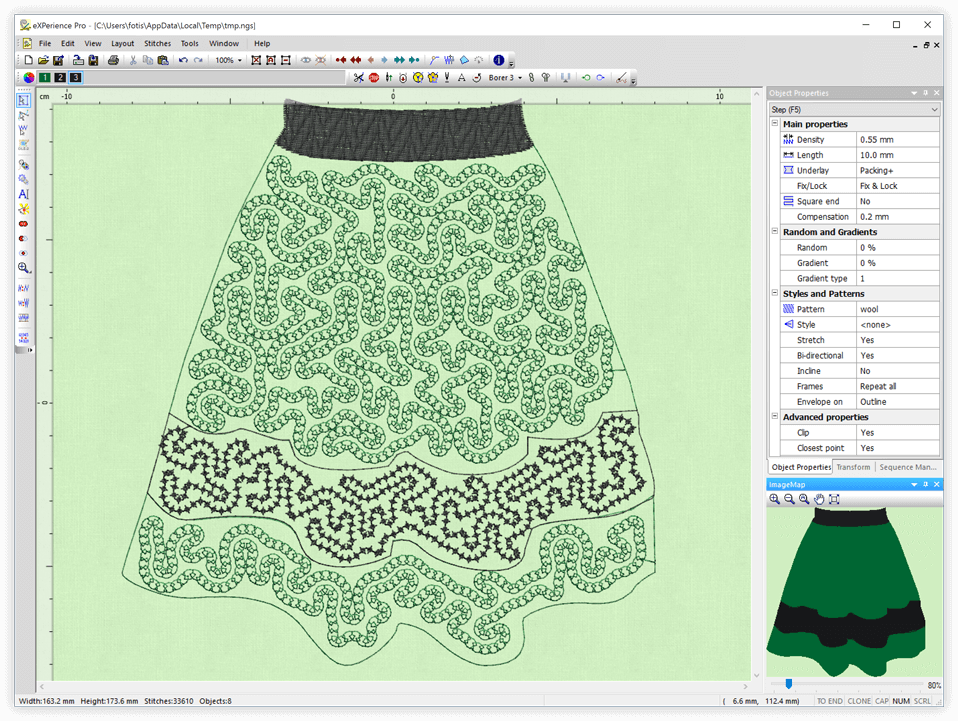
One use of this feature is to split long satin stitches equally. To use this tool you have to create an object filled with satin stitches and apply a pattern to it from the “Pattern” option of “Object properties” toolbar. Then click on the “Pattern Fit” drop down menu and select “Fit Auto” option. The pattern will be fitted on the object based on the width of the object of each Satin stitch.
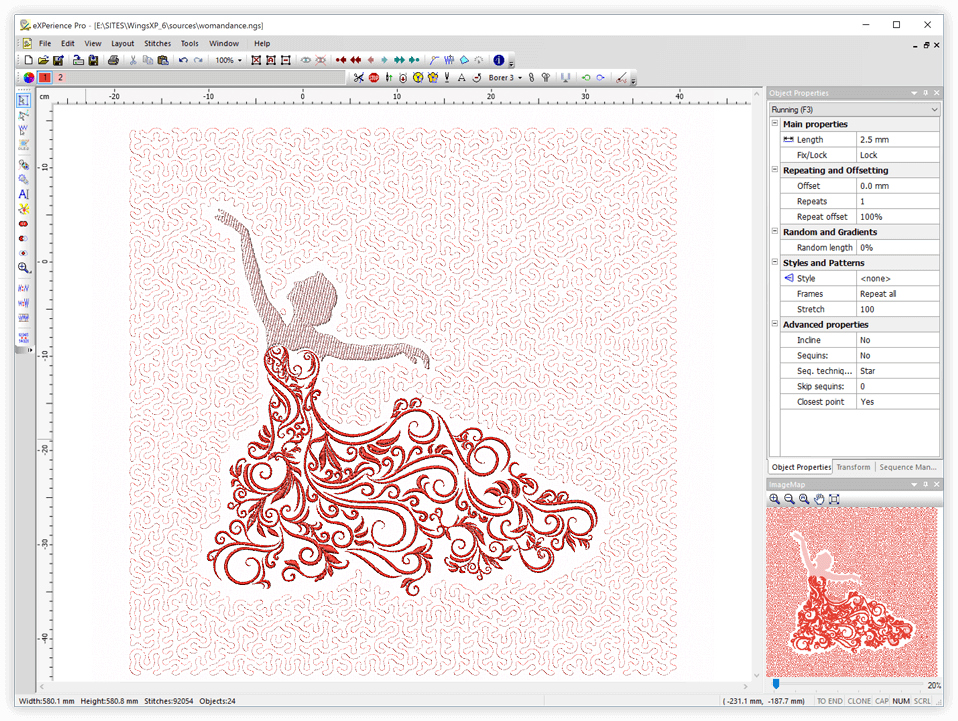
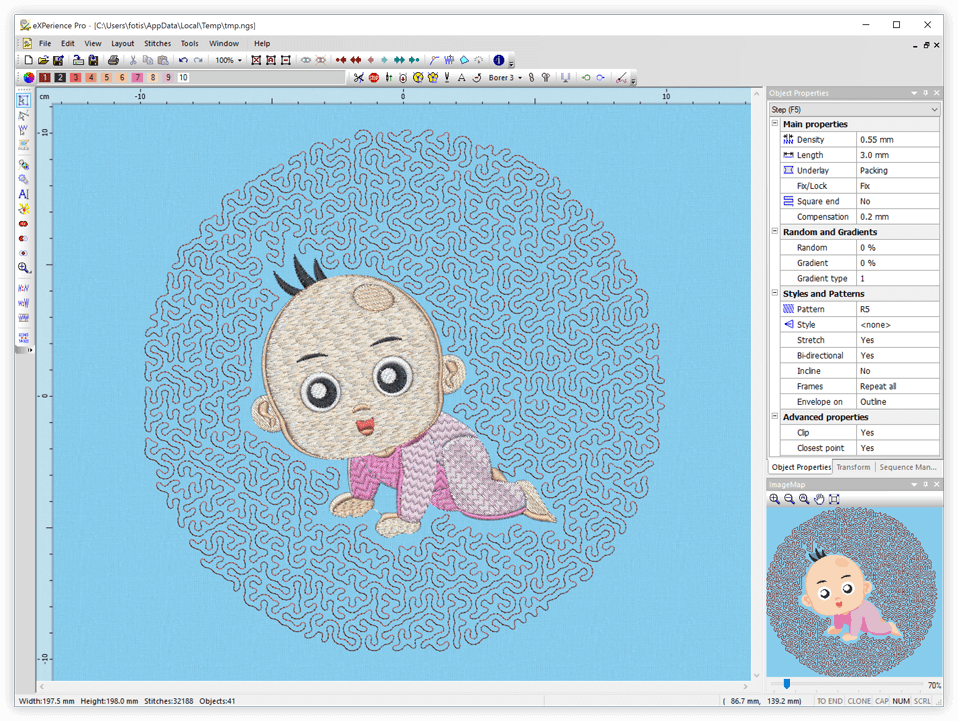
Adjust length of stippling stitches, Adjust the density, Set offset from the outline, Add styles on stippling stitches
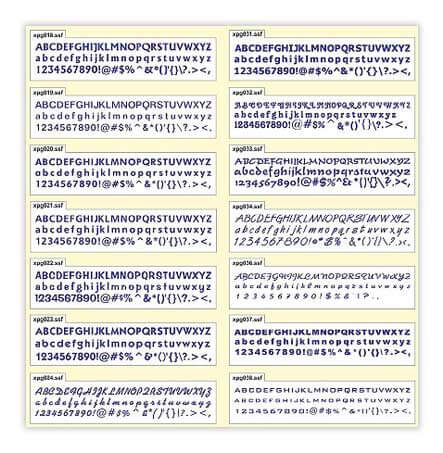
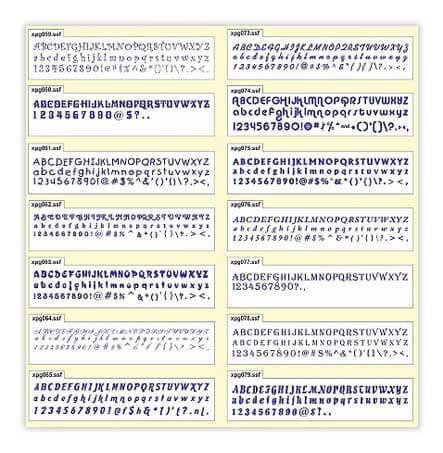
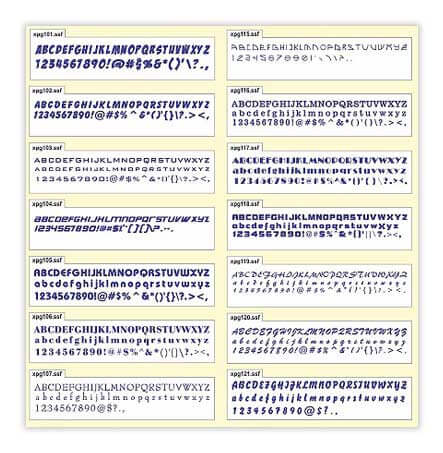
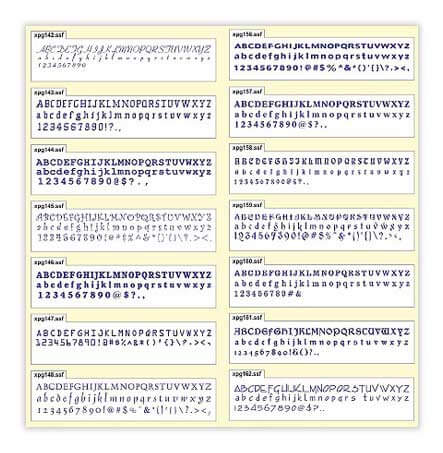
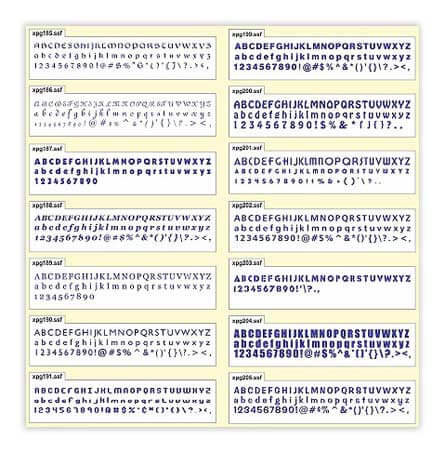
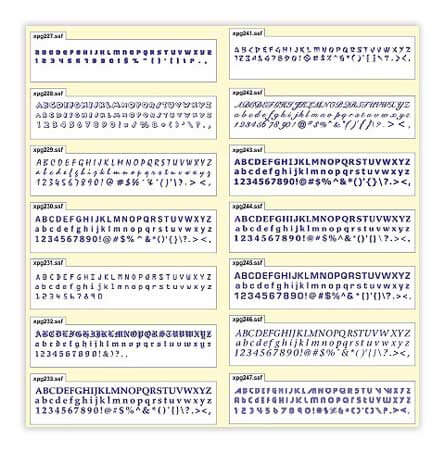
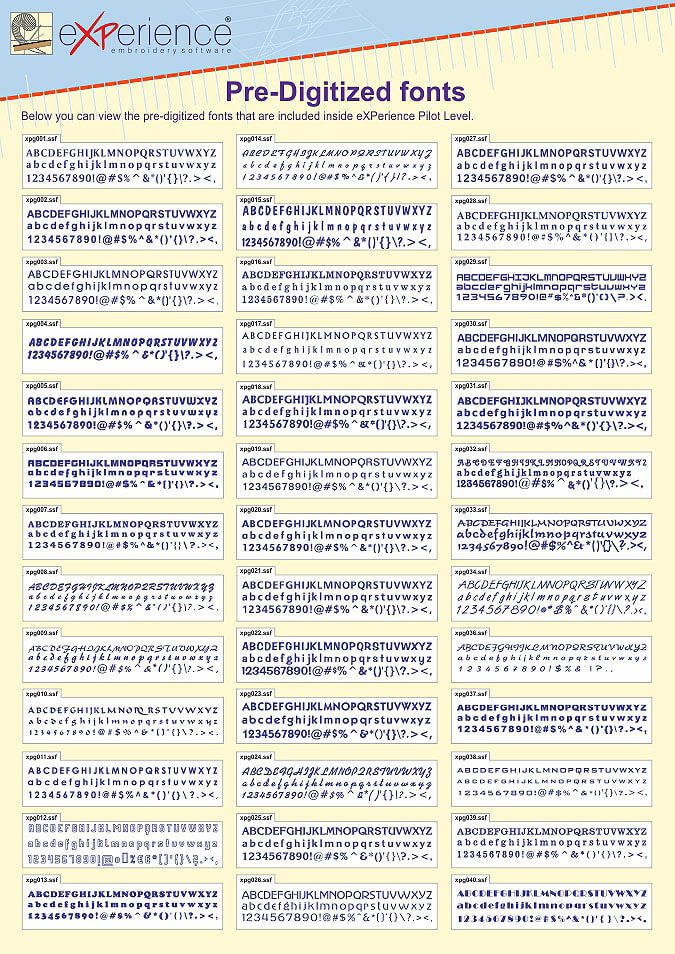
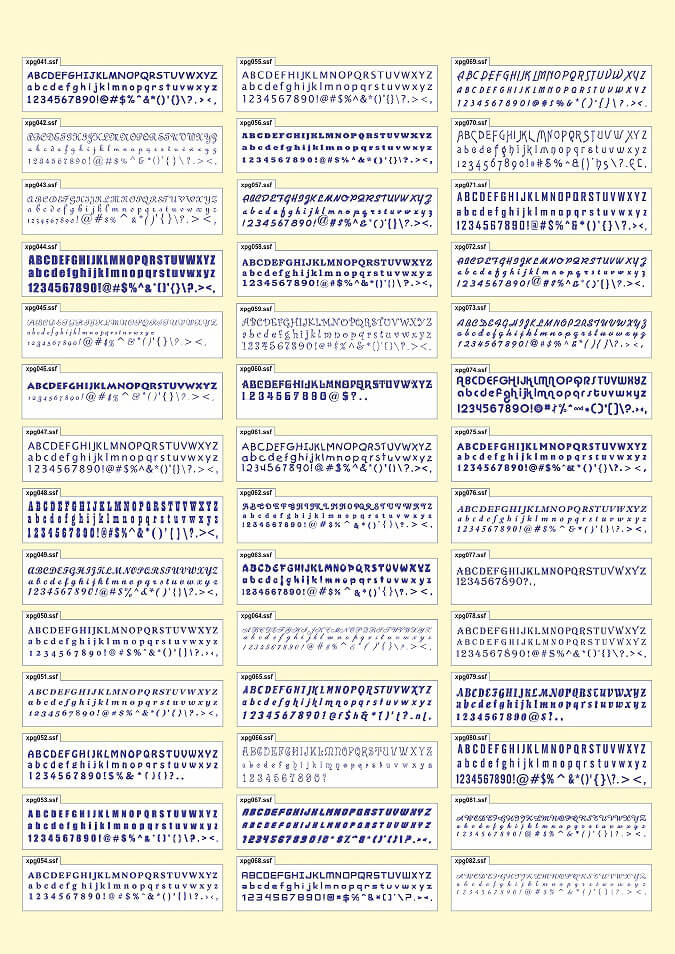
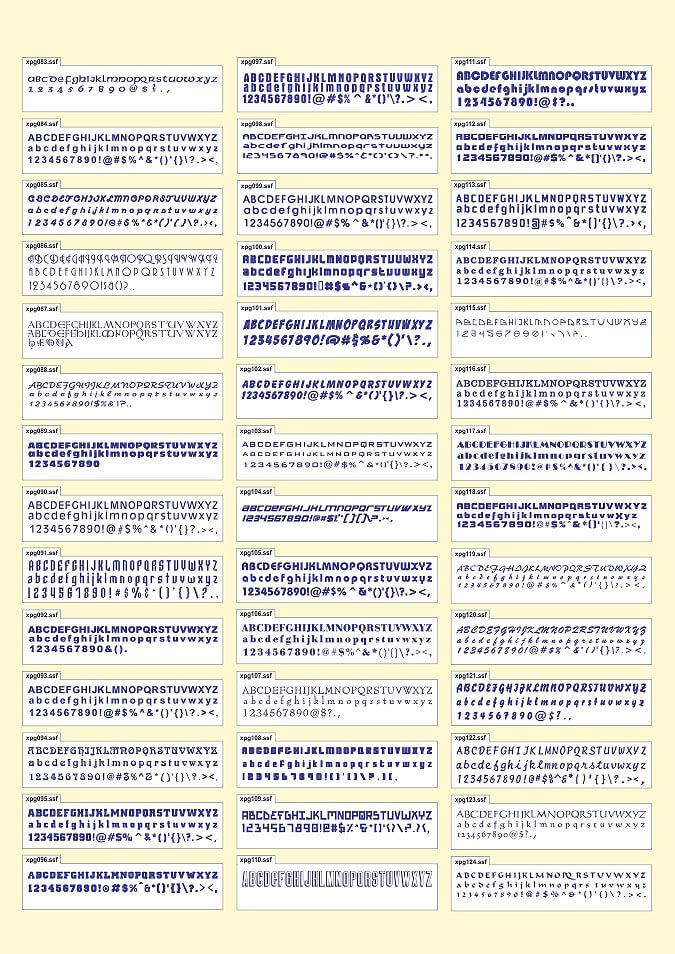
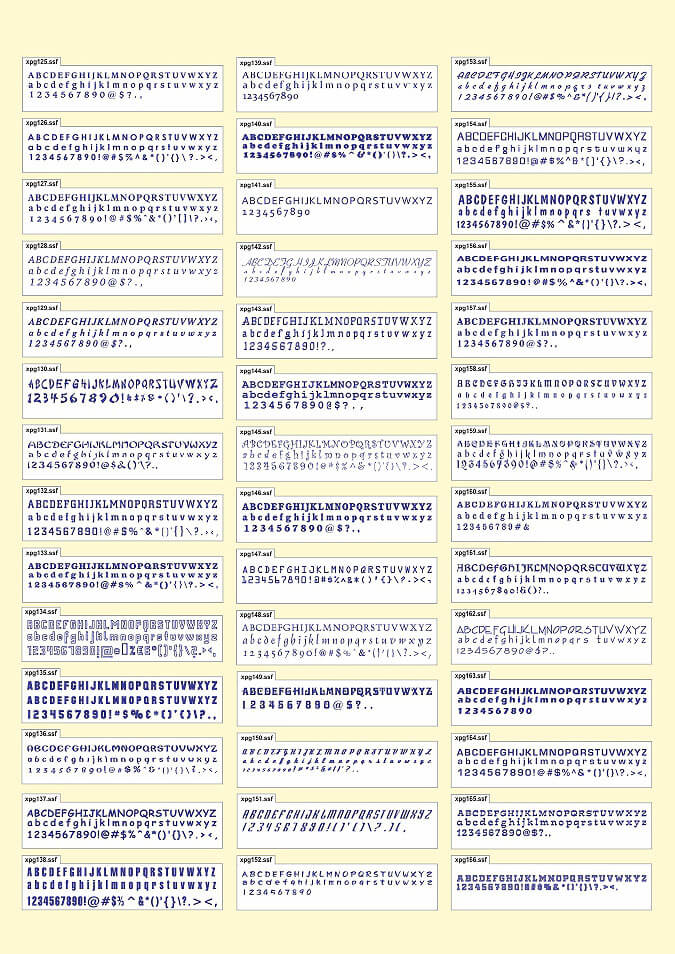
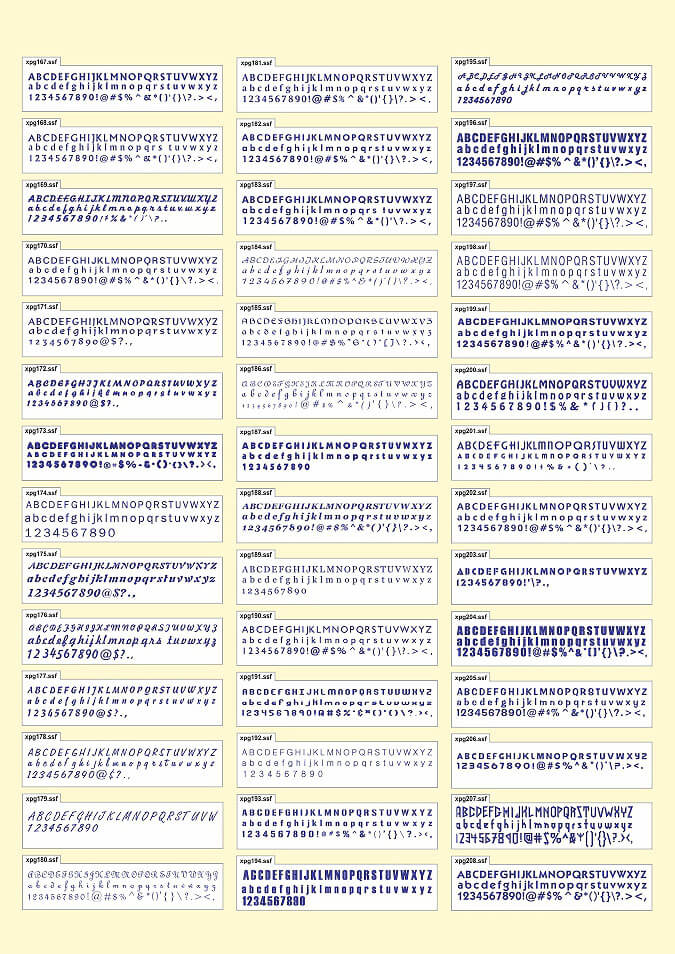
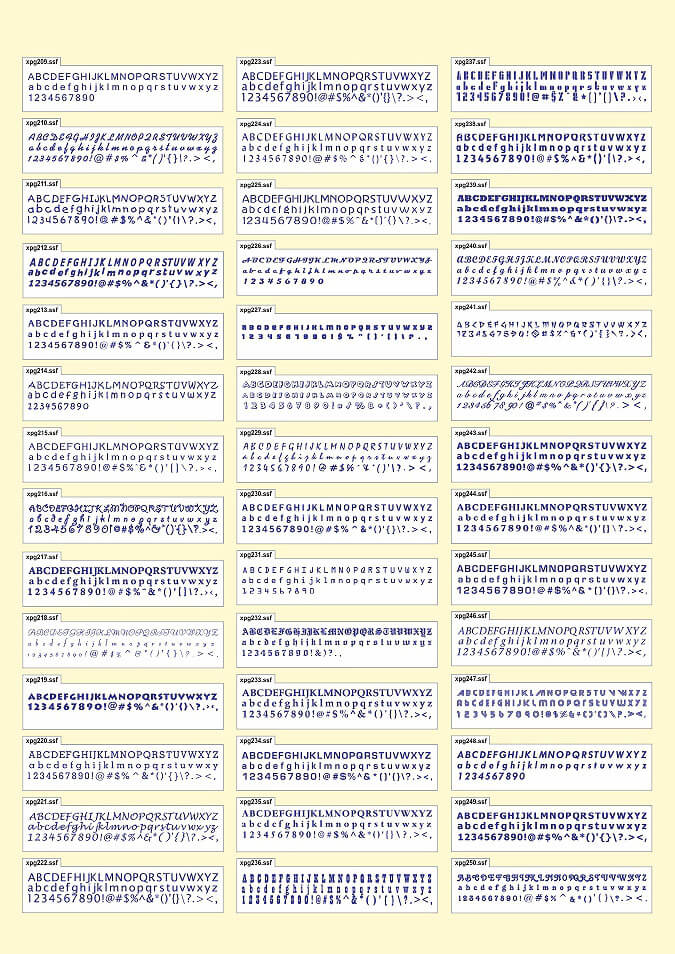
More than 255 pre-digitized fonts available for Satin - Piping - Zig Zag
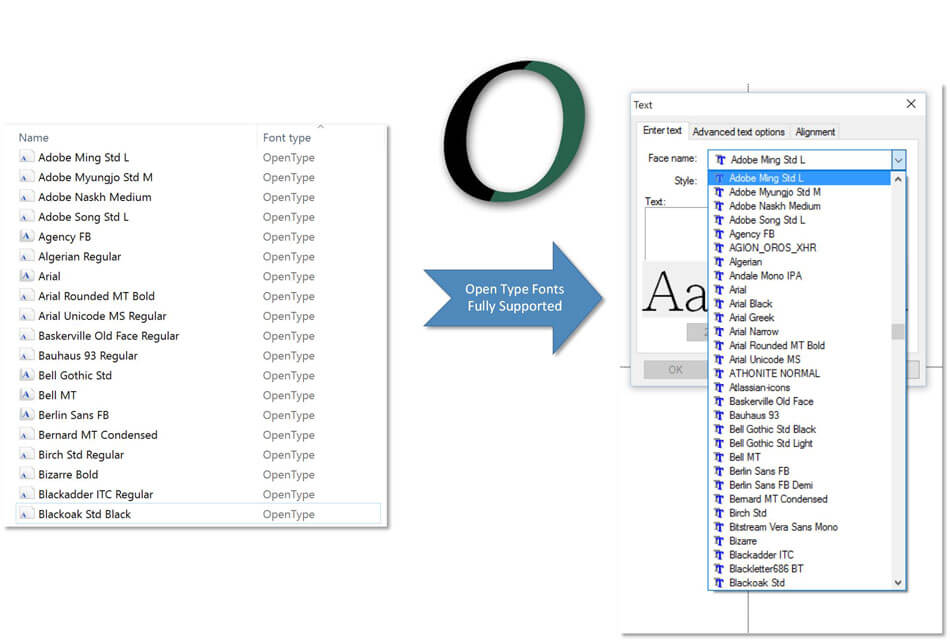
Except TrueType fonts now we support the automatic conversion to stitches of all Open Type Fonts. Just install it and you are ready to convert it to stitches.
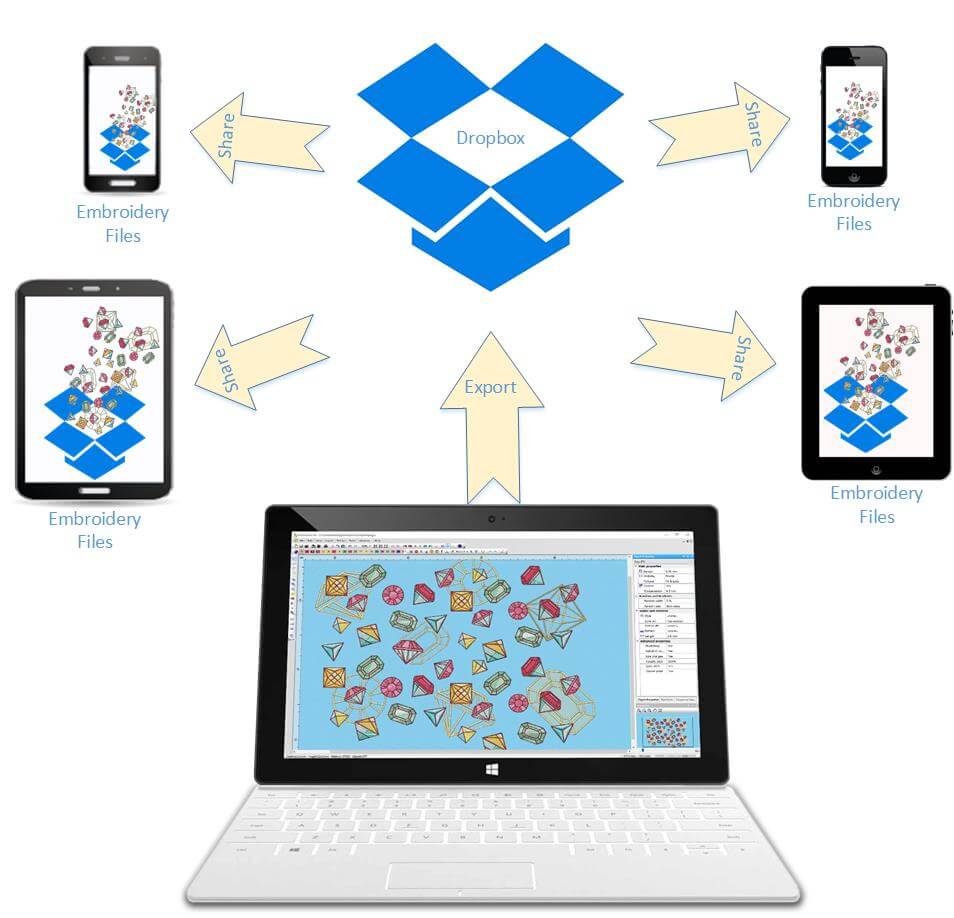
Export designs from eXPerience to DropBox and import them in any device is connected to Internet. Now, the embroidery designs are easily portable and shareable.
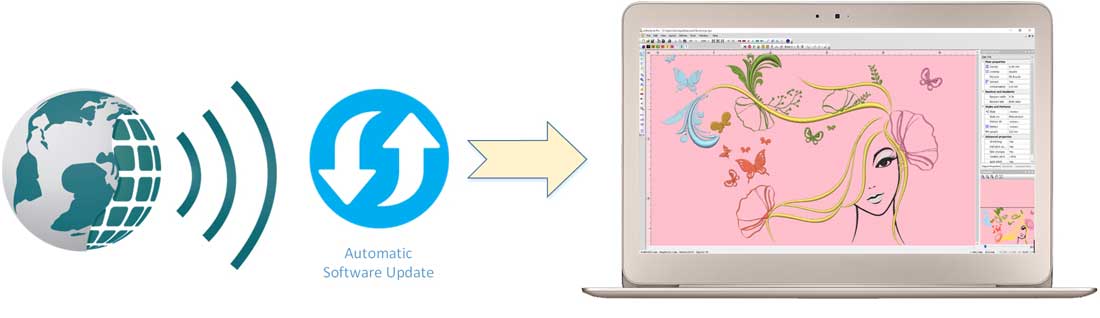
Wings' XP 6 now periodically checks for updates and informs you if there is any new additions for your software. Now you will be always up to date and use the software always with its latest features.
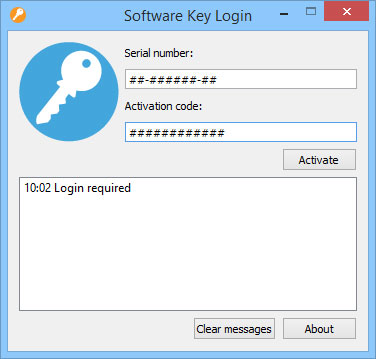
eXPerience 6 can now run with a Software key that gives you the freedom to work without worrying about where you have placed your USB hardware key. Also leaves one more USB port available for any other use. Existing customers can work with their USB hardware key or have it replaced with a Software key, upon request.
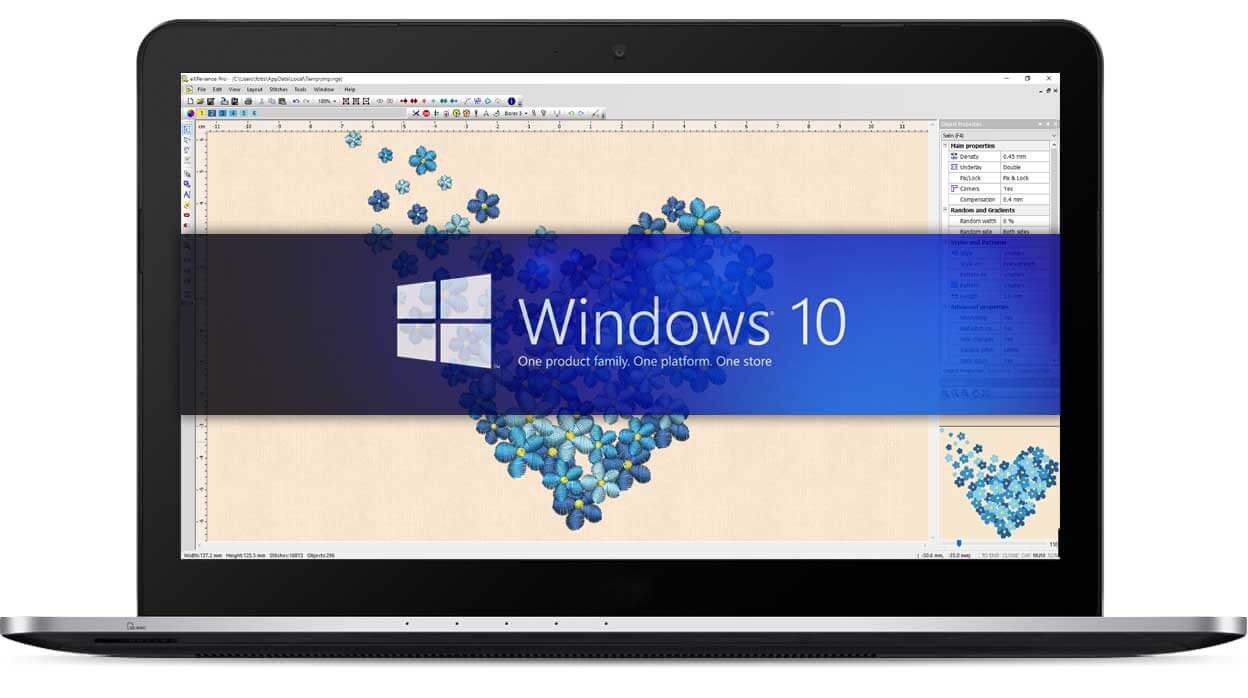
Wings' XP 6 is fully compatible with the latest Microsoft Windows Versions. It supports Windows XP, Vista, 7, 8.1 and 10.

SHARE THIS PAGE!